Golf cart batteries gradually lose performance over time. Regular testing helps you identify weak batteries early, prevent sudden failures, and maintain maximum driving range. Whether your cart uses traditional lead-acid batteries or modern lithium packs, there are several reliable ways to check battery condition.
This guide explains the most effective methods for testing golf cart batteries, including voltage testing, load testing, and capacity evaluation.
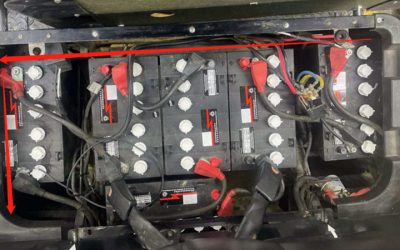
1. Start with a Visual Inspection
Before using any tools, perform a basic inspection of the battery pack.
Look for:
-
Corrosion around terminals
-
Loose cable connections
-
Cracked battery cases
-
Acid leakage (lead-acid batteries)
-
Swelling or overheating
Corrosion on terminals can cause poor electrical contact and voltage drop, reducing overall performance.
If you see corrosion, clean the terminals using a mixture of baking soda and water, then tighten the connections.
2. Check Battery Voltage with a Multimeter
A digital multimeter is one of the easiest ways to check golf cart batteries.
Steps
-
Turn off the golf cart.
-
Set the multimeter to DC voltage.
-
Place the red probe on the positive terminal.
-
Place the black probe on the negative terminal.
-
Record the voltage.
Typical Voltage Readings
| Battery Type | Fully Charged Voltage |
|---|---|
| 6V Battery | ~6.3 – 6.4V |
| 8V Battery | ~8.4 – 8.5V |
| 12V Battery | ~12.6 – 12.8V |
If one battery reads significantly lower than the others, it may be failing or undercharged.
Golf carts from manufacturers like Club Car, E-Z-GO, and Yamaha typically use multiple batteries connected in series, so a single weak battery can reduce the performance of the entire system.
3. Test Batteries Under Load
Voltage alone doesn’t always show the real condition of a battery. A load test reveals how the battery performs when power is demanded.
How to Perform a Load Test
-
Fully charge the battery pack.
-
Drive the cart or apply an electrical load.
-
Measure the voltage while the system is under load.
Signs of a Weak Battery
-
Voltage drops quickly during acceleration
-
Cart slows significantly on hills
-
Voltage recovers slowly after use
These symptoms indicate high internal resistance, which means the battery is aging.
4. Use a Hydrometer (For Lead-Acid Batteries)
If your cart uses flooded lead-acid batteries, a hydrometer can measure electrolyte specific gravity.
Steps
-
Open the battery cell caps.
-
Draw electrolyte into the hydrometer.
-
Read the specific gravity measurement.
Normal Readings
| Specific Gravity | Battery Condition |
|---|---|
| 1.265 – 1.275 | Fully charged |
| 1.200 – 1.240 | Partially charged |
| Below 1.200 | Weak battery |
A difference of more than 0.030 between cells often indicates battery damage.
Note: This test is not used for sealed AGM or lithium batteries.
5. Check the Entire Battery Pack Voltage
Instead of testing individual batteries, you can also check the total pack voltage.
Example systems:
-
36V golf cart
-
48V golf cart
For a 48V system, the pack should read approximately 50–52V when fully charged.
If the total voltage is significantly lower, one or more batteries may be failing.
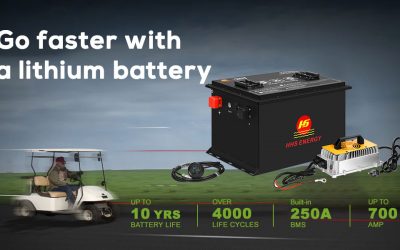
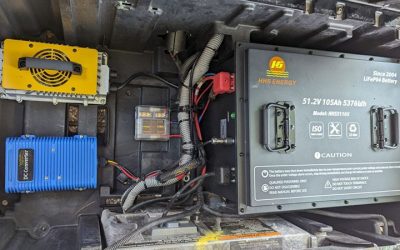
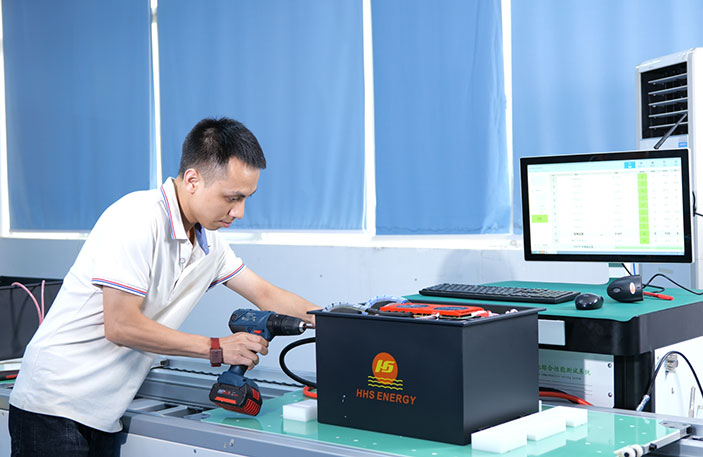
6. Monitor Lithium Battery Systems
If your golf cart uses lithium batteries from brands such as:
-
ECO Battery
-
Bolt Energy
-
ROYPOW
-
Allied Lithium
-
HHS Golf Energy
many systems include built-in Battery Management Systems (BMS).
Some batteries even provide Bluetooth monitoring apps that display:
-
battery voltage
-
charge level
-
temperature
-
charge cycles
-
remaining capacity
This makes lithium batteries easier to monitor compared with traditional lead-acid batteries.
7. Perform a Full Range Test
Another practical way to check battery health is a range test.
Steps
-
Fully charge the batteries.
-
Drive the golf cart under normal conditions.
-
Measure how far it travels before slowing down.
If your cart previously traveled 25 miles per charge but now only travels 12–15 miles, battery degradation is likely occurring.
Signs Your Golf Cart Batteries Need Replacement
Watch for these common warning signs:
-
Shorter driving range
-
Slow acceleration
-
Battery overheating
-
Frequent charging required
-
Voltage dropping quickly under load
-
Visible battery damage
Lead-acid batteries usually last 3–5 years, while lithium batteries can last 8–10 years or longer.
Safety Tips When Testing Batteries
Always follow safety precautions:
-
Wear gloves and eye protection
-
Avoid touching both terminals simultaneously
-
Turn off the golf cart before testing
-
Work in a ventilated area
Lead-acid batteries contain acid and hydrogen gas, which require careful handling.
Final Thoughts
Regularly checking golf cart batteries helps maintain performance, reliability, and safety. Simple tests such as voltage checks, load testing, and visual inspections can quickly reveal potential problems before they lead to complete battery failure.
Whether your cart uses traditional lead-acid batteries or modern lithium systems, routine battery testing ensures your golf cart stays ready for the course, the neighborhood, or daily transportation.