How To Test Golf Cart Batteries
Testing your golf cart batteries regularly is one of the most effective ways to prevent sudden power loss, extend battery life, and avoid costly replacements. Whether your cart feels slower, doesn’t hold a charge, or struggles on hills, a simple battery test can quickly reveal the problem.
This guide walks you through how to test golf cart batteries properly, covering lead-acid and lithium systems, using tools most owners already have.
Why Testing Golf Cart Batteries Matters
Golf cart batteries degrade gradually. By the time a cart won’t move, damage is often already severe. Routine testing helps you:
-
Identify weak or failing batteries early
-
Maintain consistent performance
-
Prevent overworking good batteries
-
Maximize driving range
-
Avoid being stranded mid-round
Testing is especially important because one bad battery can damage the entire pack.
What You Need to Test Golf Cart Batteries
You don’t need professional equipment. Basic tools include:
-
Digital multimeter (most important)
-
Battery load tester (optional)
-
Hydrometer (for flooded lead-acid only)
-
Safety gloves and eye protection
-
Notebook or phone for recording readings
Step 1: Fully Charge the Batteries
Always test batteries after a full charge. Testing partially charged batteries produces misleading results.
-
Charge overnight
-
Let batteries rest for at least 30–60 minutes after charging
-
Turn off the cart and accessories
Step 2: Visual Inspection (Don’t Skip This)
Before using tools, look closely at each battery.
Signs of a failing battery:
-
Cracked casing
-
Bulging or swelling
-
Leaking fluid
-
Corrosion on terminals
-
Burnt smell
⚠️ If a battery shows swelling or leaking, replace it immediately.
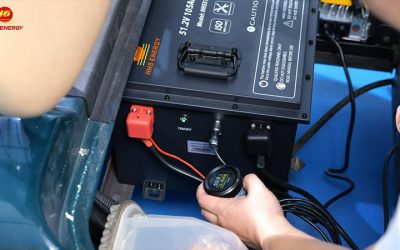
Step 3: Test Voltage with a Multimeter
This is the fastest and most reliable test.
How to test:
-
Set multimeter to DC volts
-
Place red probe on positive terminal
-
Place black probe on negative terminal
-
Record the reading
Healthy Voltage Readings (At Rest)
6-Volt Battery
-
6.3V – 6.4V: Excellent
-
6.1V – 6.2V: Acceptable
-
Below 6.0V: Weak or failing
8-Volt Battery
-
8.4V – 8.5V: Excellent
-
8.2V – 8.3V: Acceptable
-
Below 8.0V: Weak
12-Volt Battery
-
12.7V – 12.9V: Fully healthy
-
12.4V – 12.6V: Aging
-
Below 12.2V: Failing
👉 Any battery reading significantly lower than the others is a problem.
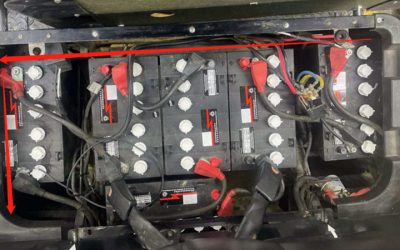
Step 4: Compare Individual Battery Readings
Golf carts use battery packs wired in series. All batteries should read very close to each other.
-
A difference of more than 0.2V indicates imbalance
-
One weak battery forces others to overwork
-
Replace all batteries together for best results
Step 5: Perform a Load Test
Voltage at rest doesn’t tell the whole story. Load testing checks performance under real conditions.
How to do a simple load test:
-
Leave multimeter connected
-
Press accelerator pedal
-
Observe voltage drop
What to look for:
-
Small drop = healthy
-
Sudden or steep drop = failing battery
If voltage collapses under load, the battery can’t deliver enough current.
Step 6: Hydrometer Test (Flooded Lead-Acid Only)
⚠️ Do NOT use on sealed AGM or lithium batteries.
Hydrometers measure electrolyte density.
| Reading | Battery Condition |
|---|---|
| 1.265 | Fully charged |
| 1.225 | Partially charged |
| 1.190 | Weak |
| Below 1.160 | Failing |
Uneven readings across cells indicate internal damage.
Step 7: Test the Entire Battery Pack
After individual testing, check total system voltage.
Examples:
-
36V system → ~38V fully charged
-
48V system → ~50–51V fully charged
Low total voltage often means one or more weak batteries dragging down the pack.
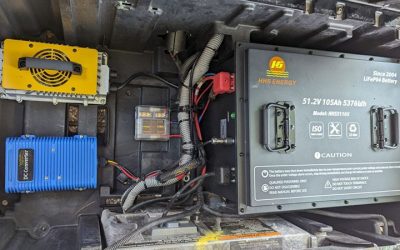
Testing Lithium Golf Cart Batteries
Lithium batteries require a slightly different approach.
What’s different:
-
Voltage stays stable until near empty
-
BMS (Battery Management System) protects cells
-
Individual cell testing is usually not accessible
How to test lithium systems:
-
Check pack voltage
-
Monitor runtime drop
-
Watch for error codes
-
Use manufacturer monitoring apps if available
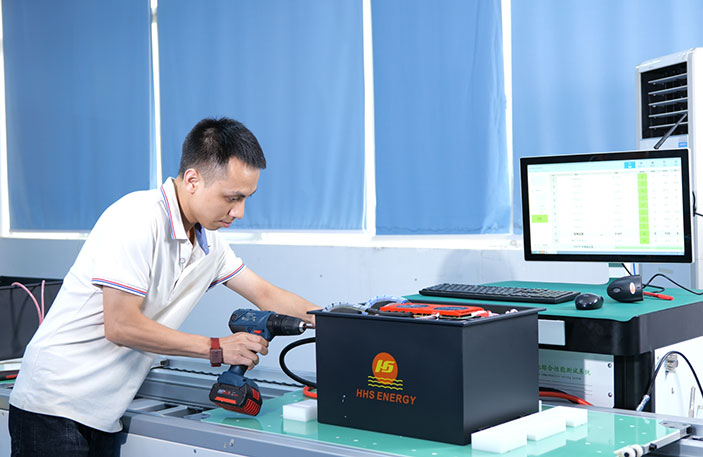
High-quality lithium packs from brands like ECO Battery, Bolt Energy, ROYPOW, Allied, and HHS Golf Energy include smart diagnostics for easy testing.
How Often Should You Test Golf Cart Batteries?
| Usage Level | Testing Frequency |
|---|---|
| Light use | Every 3 months |
| Regular use | Monthly |
| Heavy use | Every 2–4 weeks |
| Before long trips | Always |
Common Testing Mistakes to Avoid
❌ Testing before charging
❌ Ignoring small voltage differences
❌ Replacing only one battery
❌ Testing lithium like lead-acid
❌ Skipping visual inspection
When to Replace Golf Cart Batteries
Replace batteries when:
-
Voltage drops rapidly under load
-
Runtime decreases noticeably
-
Batteries won’t balance after charging
-
Physical damage is present
-
Pack age exceeds 4–6 years (lead-acid)
Final Thoughts
Testing golf cart batteries is simple, inexpensive, and extremely valuable. With a multimeter and a few minutes, you can catch problems early, improve performance, and extend battery life significantly.
Whether you’re running traditional lead-acid batteries or modern lithium systems, routine testing ensures your cart stays reliable every time you turn the key.